In-Depth Guide to Custom Update Modes in Tech2Win
Are you looking to enhance your diagnostic capabilities with Tech2Win? Understanding and utilizing the custom update modes in Tech2Win can significantly improve your software’s performance and ensure you are always equipped with the latest GM diagnostic tools. In this in-depth guide to custom update modes in Tech2Win, we will walk you through the step-by-step process of performing software downloads from TIS2Web, explain the benefits of using custom update modes over standard ones, and provide expert tips to optimize your setup. By the end of this article, you’ll have the knowledge to keep your Tech2Win software up-to-date and running smoothly, ensuring you can tackle any diagnostic challenge with confidence.

What is Tech2Win?
Tech2Win is a PC program that executes Tech2 software on a Windows PC, allowing it to communicate with a vehicle through a vehicle communication interface (VCI) using the MDI or an ISO 22900 PDU API compliant device. This powerful tool supports almost all vehicle systems that Tech2 does, making it an essential tool for automotive diagnostics.
Why Use Custom Update Modes?
Using custom update modes in Tech2Win allows you to overwrite the demonstration software with the newest diagnostic software, ensuring that you always have the most current version. This is crucial for maintaining the accuracy and efficiency of your diagnostic processes.
Step-by-Step Guide to Custom Update Modes in Tech2Win
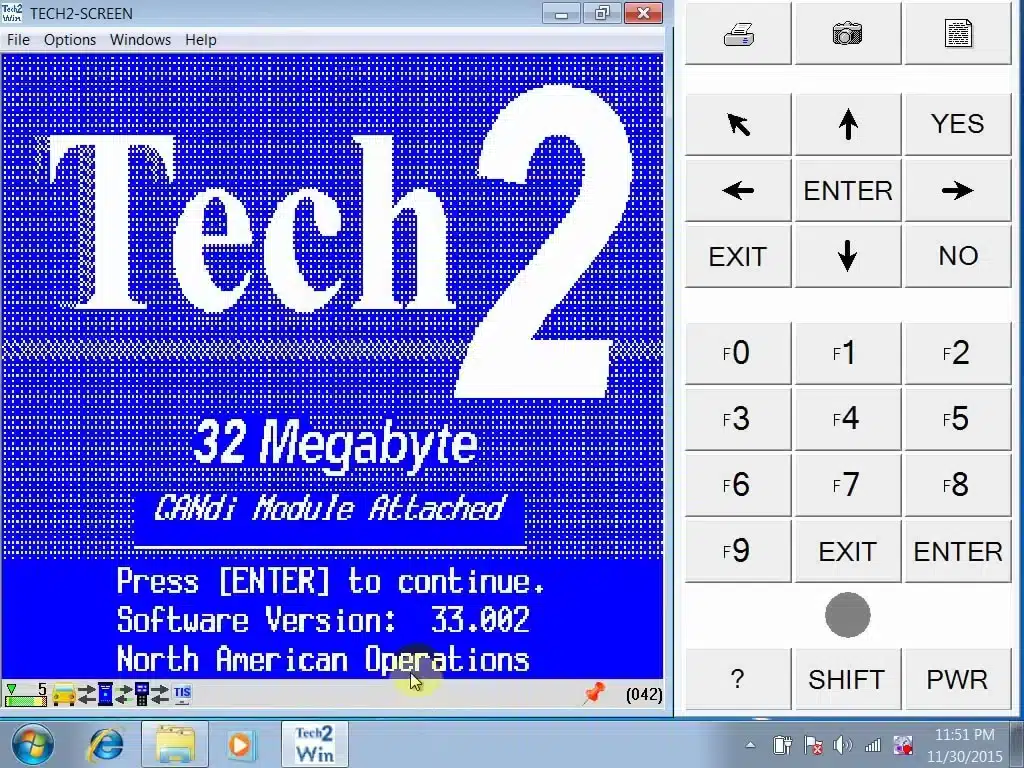
Step 1: Start Tech2Win
If Tech2Win is not already running, start the program from the desktop by clicking on the Tech2Win start symbol or from the start menu: Start >> Programs >> General Motors >> Tech2Win.
Step 2: Perform a Software Download from TIS2Web
Perform a Tech2 software download from TIS2Web as if downloading to a Tech2. This will activate your license and update your QuickStart Tech2 software to the current version.
Step 3: Select Custom Update Mode
When performing the download, use the update mode ‘Custom’ instead of ‘Standard’ to overwrite the demonstration software with the newest diagnostic software.
Step 4: Specify the COM Port
Use ‘Search’ as the COM Port or specify the COM Port you chose Tech2Win to create. On the Tech2Win screen, you should see the familiar blocks running from left to right, similar to Tech2.
Step 5: Save Your Configuration
Save your configuration by pressing the “Save” button at the lower left of the configuration screen.
Benefits of Using Custom Update Modes
- Up-to-Date Software: Ensures you have the latest diagnostic tools and software updates.
- Improved Performance: Enhances the accuracy and efficiency of your diagnostic processes.
- Flexibility: Allows you to store multiple configurations, each with its own PCMCIA card file or MDI serial number.
Troubleshooting Tips
If you encounter any issues during the update process, refer to the help guide available under Start >> Programs >> General Motors >> Tech2Win >> Help. This section provides detailed descriptions and solutions to common problems.
Conclusion
Mastering the custom update modes in Tech2Win is essential for any automotive professional looking to stay ahead in diagnostics. By following this guide, you can ensure your Tech2Win software is always up-to-date, providing you with the tools needed to tackle any diagnostic challenge. Remember to refer to the Tech2Win User Guide for additional support and detailed instructions.
Stay tuned for more advanced GM tips and guides to make the most out of your Tech2Win experience!