Introduction
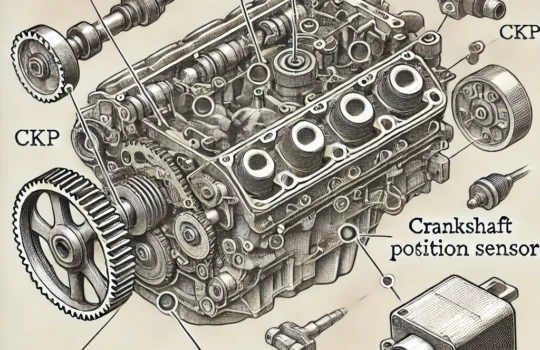
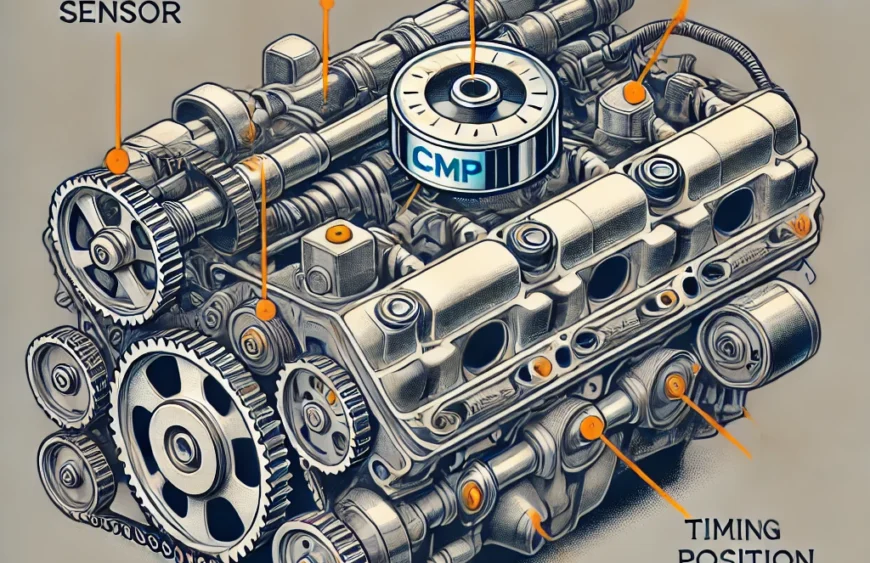
The camshaft position sensor replacement is a crucial maintenance task for modern engines, as the sensor works alongside the crankshaft position sensor (CKP) to regulate ignition timing and fuel injection. The camshaft position sensor (CMP) is a crucial component in modern engines, working alongside the crankshaft position sensor (CKP) to regulate ignition timing and fuel injection. A failing CMP sensor can cause poor performance, rough idling, and even prevent the engine from starting. In this guide, we will discuss how to diagnose and replace a faulty camshaft position sensor.
Symptoms of a Failing Camshaft Position Sensor
A faulty CMP sensor can exhibit several warning signs, including:
- Check Engine Light (CEL) Activation – The ECU logs a diagnostic trouble code (DTC) related to the CMP sensor, commonly P0340 or P0341.
- Engine Misfires – Incorrect timing can cause misfiring, leading to rough performance and reduced power.
- Hard Starting or No-Start Condition – If the ECU does not receive an accurate signal from the CMP sensor, it may prevent the engine from starting.
- Poor Fuel Efficiency – Inaccurate sensor readings can disrupt the air-fuel mixture, leading to increased fuel consumption.
- Rough Idling or Stalling – A malfunctioning CMP sensor can cause erratic engine behavior, such as unstable RPMs and sudden stalls.
Note: If your vehicle also exhibits crankshaft position sensor-related issues, refer to our Comprehensive Guide to Crankshaft Position Sensor Testing for further diagnosis.
Diagnosing a Faulty Camshaft Position Sensor
Step 1: Retrieve Diagnostic Trouble Codes (DTCs)
- Connect an OBD-II Scanner to the vehicle’s diagnostic port.
- Turn the ignition to “ON” without starting the engine.
- Scan for trouble codes. Look for P0340 (CMP Sensor Circuit Malfunction) or P0341 (CMP Sensor Circuit Range/Performance Issue).
- Clear the codes and restart the engine to check if they return.
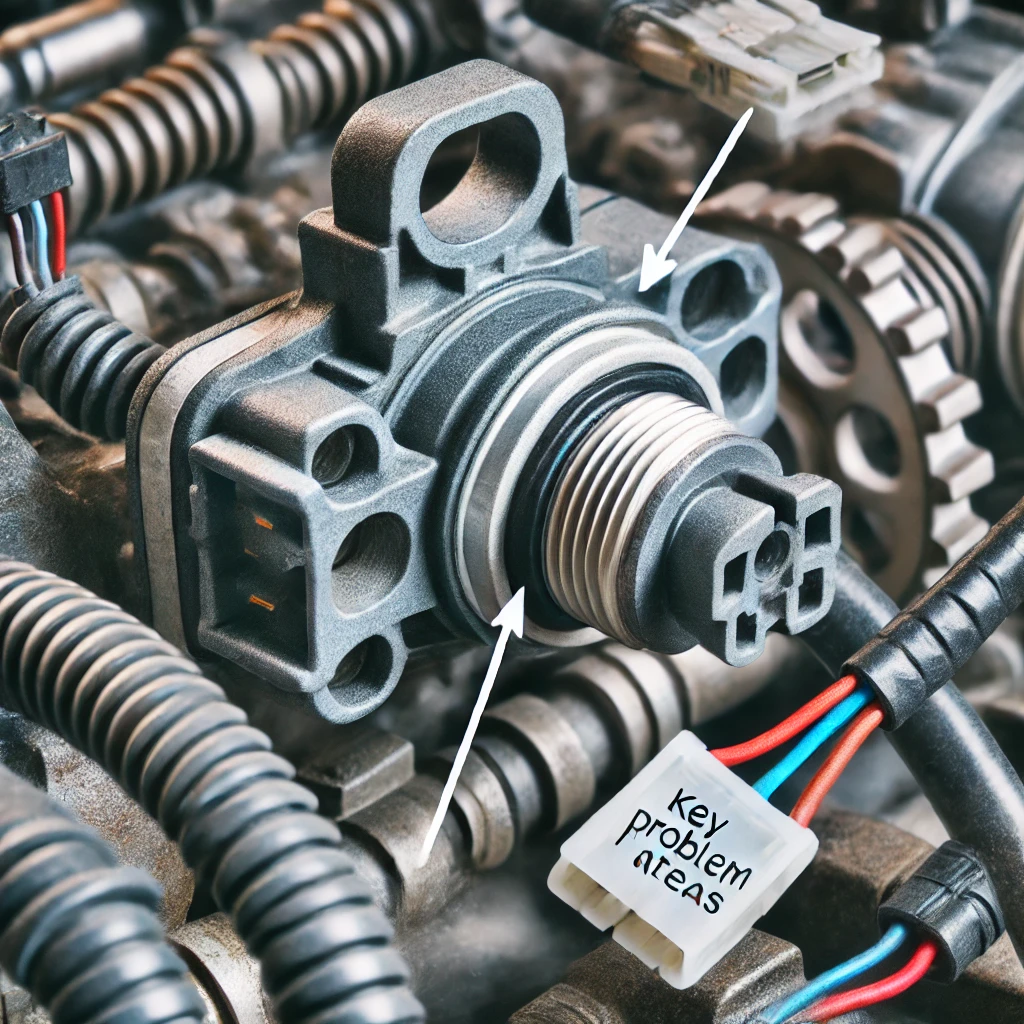
Step 2: Perform a Visual Inspection
- Check for damaged wiring, loose connections, or corroded terminals on the CMP sensor harness.
- Ensure the sensor is securely mounted and not contaminated with debris or oil.
- Inspect the reluctor wheel or timing components for damage, as misalignment can cause sensor issues.
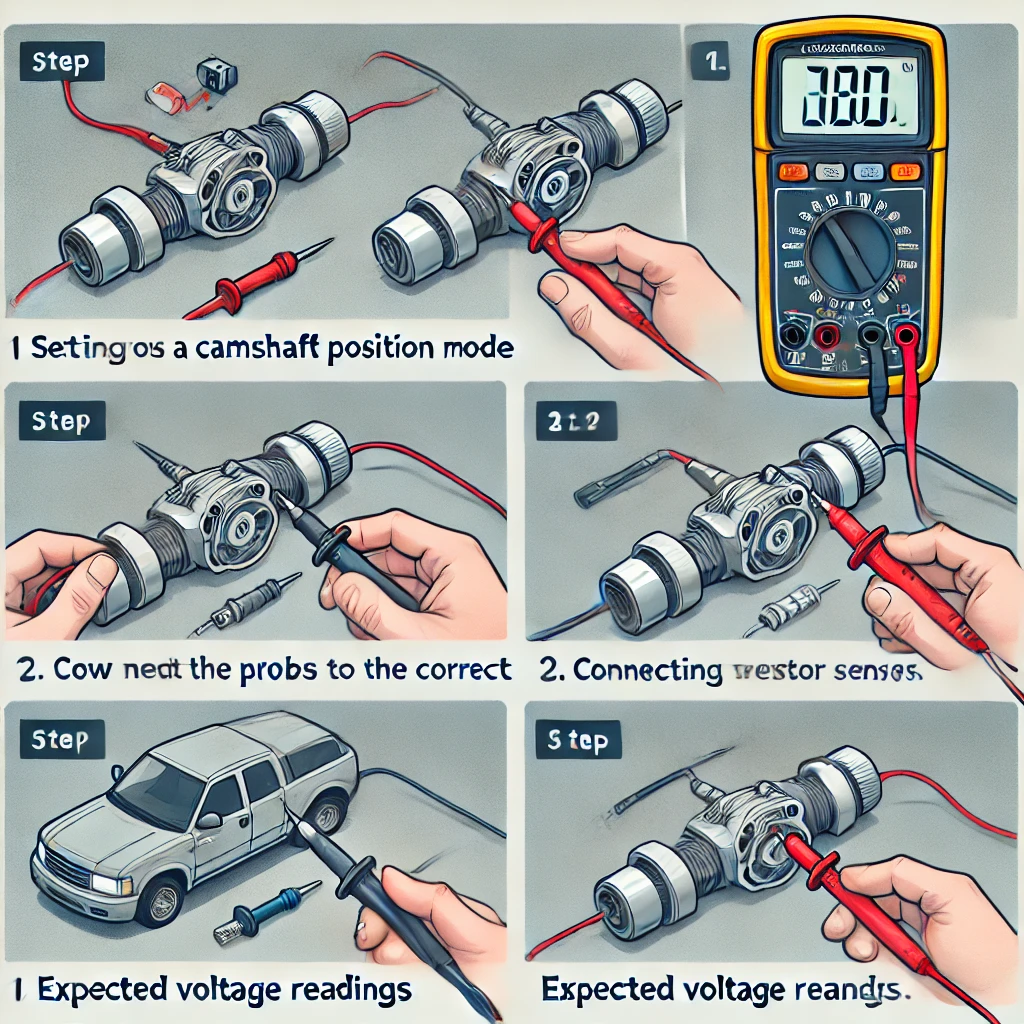
Step 3: Test the Camshaft Position Sensor with a Multimeter
For Hall Effect CMP Sensors:
- Set the multimeter to DC voltage mode.
- Back-probe the sensor’s signal wire while the ignition is ON.
- A healthy CMP sensor will produce a fluctuating 0V to 5V signal when cranking the engine.
- If the reading is static, the sensor is likely faulty.
For Inductive CMP Sensors:
- Set the multimeter to AC voltage mode.
- Connect probes across the sensor terminals.
- Crank the engine and observe voltage fluctuations (typically 0.5V to 1.5V AC).
- No voltage output indicates a failed sensor.
For more information on sensor waveform patterns, see our Crankshaft Position Sensor Testing Guide.
Camshaft Position Sensor Replacement
Tools Needed:
- Socket wrench set
- Screwdrivers
- OBD-II scanner (optional)
- New camshaft position sensor
Step-by-Step Replacement Guide:
This section provides a detailed guide on camshaft position sensor replacement, ensuring a smooth and accurate process for DIY enthusiasts and professionals alike.
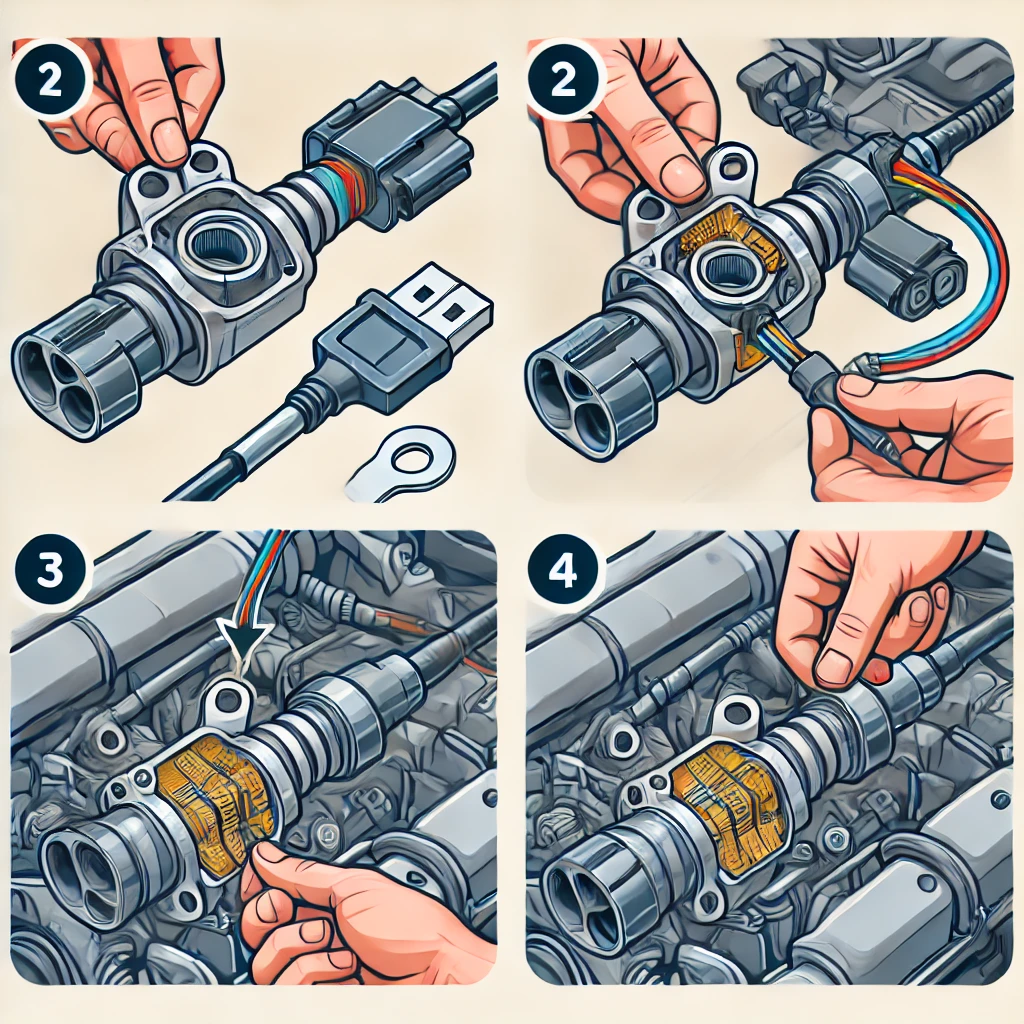
- Disconnect the Battery – Prevent electrical shorts by disconnecting the negative battery terminal.
- Locate the CMP Sensor – Typically found near the cylinder head, camshaft gear, or timing cover.
- Unplug the Electrical Connector – Carefully detach the sensor’s wiring harness.
- Remove the Old Sensor – Use a socket wrench to unscrew the mounting bolt and pull out the faulty sensor.
- Install the New Sensor – Align it properly and secure it with the mounting bolt.
- Reconnect the Electrical Connector – Ensure a snug fit for proper signal transmission.
- Reconnect the Battery and Test – Start the engine and use an OBD-II scanner to clear any stored fault codes.
Conclusion
A faulty camshaft position sensor can cause significant engine performance issues, but diagnosing and replacing it is relatively straightforward. If your vehicle continues to exhibit similar symptoms, consider testing the crankshaft position sensor as well. For a full troubleshooting guide, refer to our Crankshaft Position Sensor Testing Guide.